
Notes on Techniques
All the formal insect images on this site have been produced using a stereo microscope with a camera lucida attached. Freehand drawing is not permitted, as the image has to be measurably accurate. The camera lucida uses a system of prisms, lenses and a mirror to allow the artist to see a shadowy image of the pencil and paper at the same time as he or she is looking down the microscope at the specimen. Light levels on the specimen and paper have to be carefully balanced and detail is often hard to discern with the device engaged. The outline and major features are traced using the camera lucida. Then the outline of the body is traced again onto tracing paper and lined up to compensate for angle distortions and twisting of the specimen. Legs and antennae are drawn in last. Often the specimen must be viewed at many different angles to see all the segments of the appendages so they can be reconstructed as they might appear in life. In a formal taxonomic drawing no foreshortening of legs is permitted, as the relative lengths of the various segments must be shown accurately.
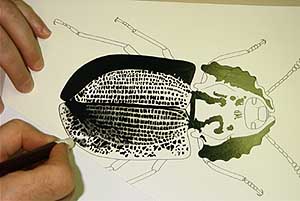
Once the outline has been lined up, it is transferred to the drawing surface. The black and white drawings are done using white scraperboard or sometimes, clay-coated paper, which can also be scraped, once. Scraperboard has a sprayed-on white clay surface, which can be scraped many times. The outline is firstly inked in and any darker areas are mapped out before painting them black with ink. The edges of the painted areas are then densely stippled with a pen to blend in with the lighter areas, where shading is also rendered using stippled dots put on with a technical pen.
Once the black painted areas are dry they can be scraped white again in little dots, patches and sometimes lines to blend the shading with the stippled areas. This blending of stippling and scraping can produce a very realistic, almost photographic effect. In darker insects it is possible to render nearly all the shading and highlights using a scraper on a painted ink surface. All the work is done by hand.
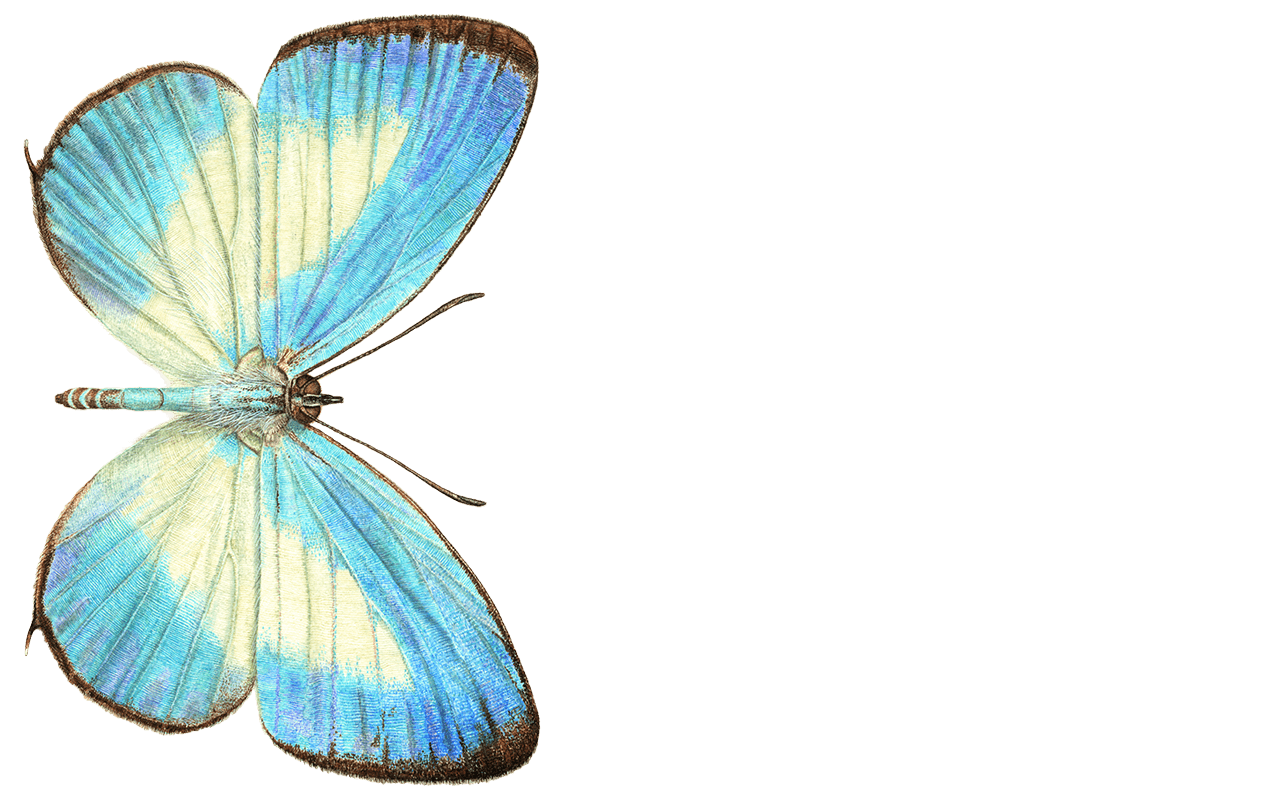
Geoff has combined his insect drawing skills with his self-taught watercolour technique to produce coloured illustrations that he does in his own time at home. He works on stretched, hot-pressed paper using traditional transparent watercolour except for a final use of white in hairs and sometimes a few highlights. Most of the painting is done using the white of the paper alone to give the shade of colour and highlights required. Geoff prefers this traditional technique, which tends to have more sparkle and charm, to the use of gouache.
At one time Geoff also experimented with combinations of ink and stippling with bright watercolour. Once again no gouache was used though sometimes the colour is strong and even. These images though containing some realistically painted objects allowed some use of false colour and fantasy.
Since 1998 Geoff has been learning etching, an intaglio print making technique. This basically involves coating a zinc or copper plate with a resistant waxy layer, called a ground and scratching an image using a needle. Then acid is used to eat away at the bare metal exposed by the needle to create grooves and pits in the surface of the metal. The ground is removed with turpentine, the edges of the plate are filed smooth and ink is forced into the grooves and pits. The excess is wiped off with bits of old telephone book and the plate is placed on a paper registration sheet on the heavy, flat, metal bed of a press.
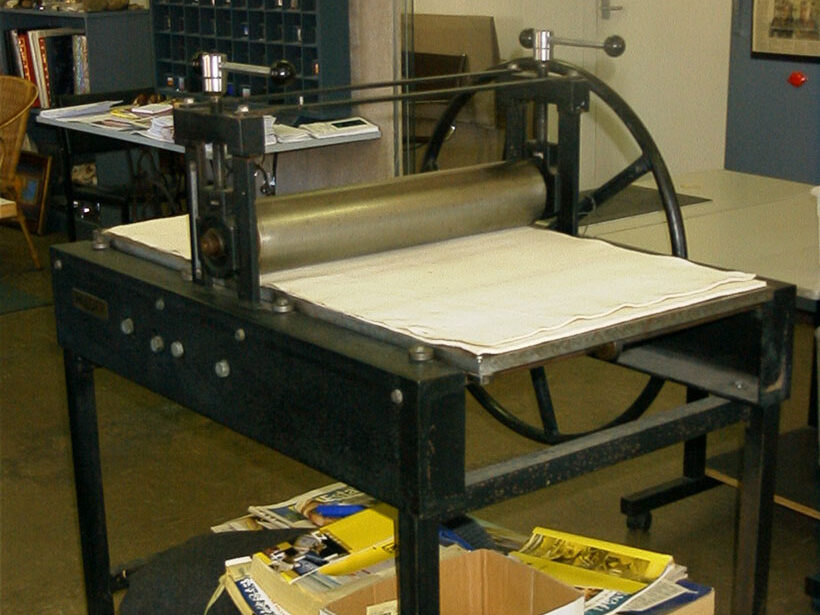
A sheet of dampened paper is placed over the plate, using marks on the registration sheet as a positioning guide and then this is covered with an extra layer of paper and felt blankets. The whole thing is then rolled through the upper and lower rollers of the press, set to apply an even pressure as it passes through. The paper is forced down into the grooves and pits transferring the image to its surface. Refinements like aquatint, to produce an even tone and multi-coloured inking are also used.
The black and white drawings are generally designed to be photographically reduced before being reproduced in a book or journal. The Kakadu drawings of magnetic termites and a red meat ant are an exception as they were designed for an outside exhibit sign. The artist generally has no control over the level of reduction so drawings need to be clear and crisp. By contrast the watercolours and etchings are designed to be seen as works of art on the wall but will normally also reproduce well when reduced.
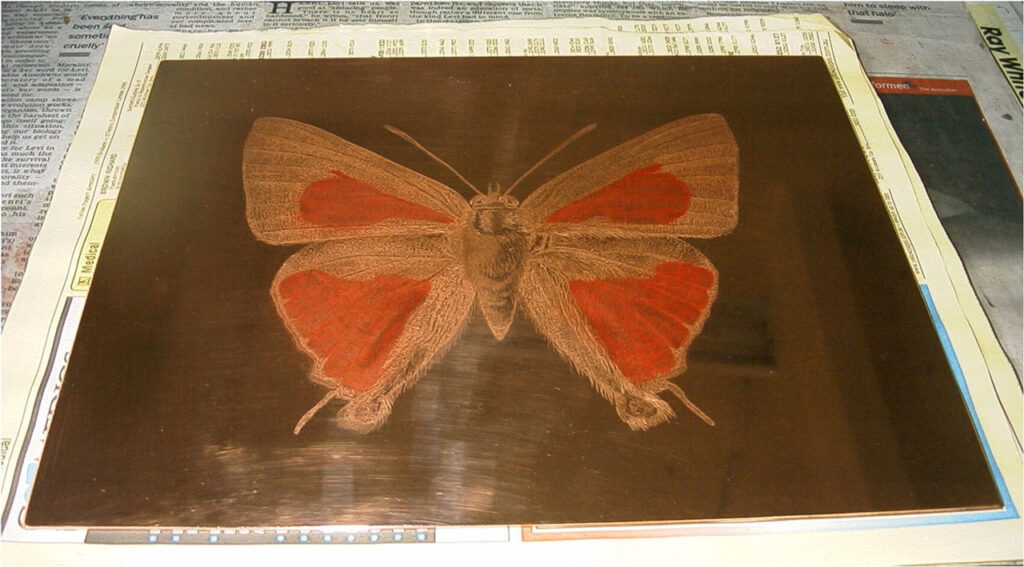
Major black and white drawings usually take Geoff between 20 and 40 hours of work. Watercolour works can take between 20 to 100 hours depending on the complexity of the subject. The main image copper plate for the coloured cornelian butterfly etching took five solid weekends and many late nights to produce. Printing each copy takes nearly an hour and adding extra hand colouring takes another hour and a half.